
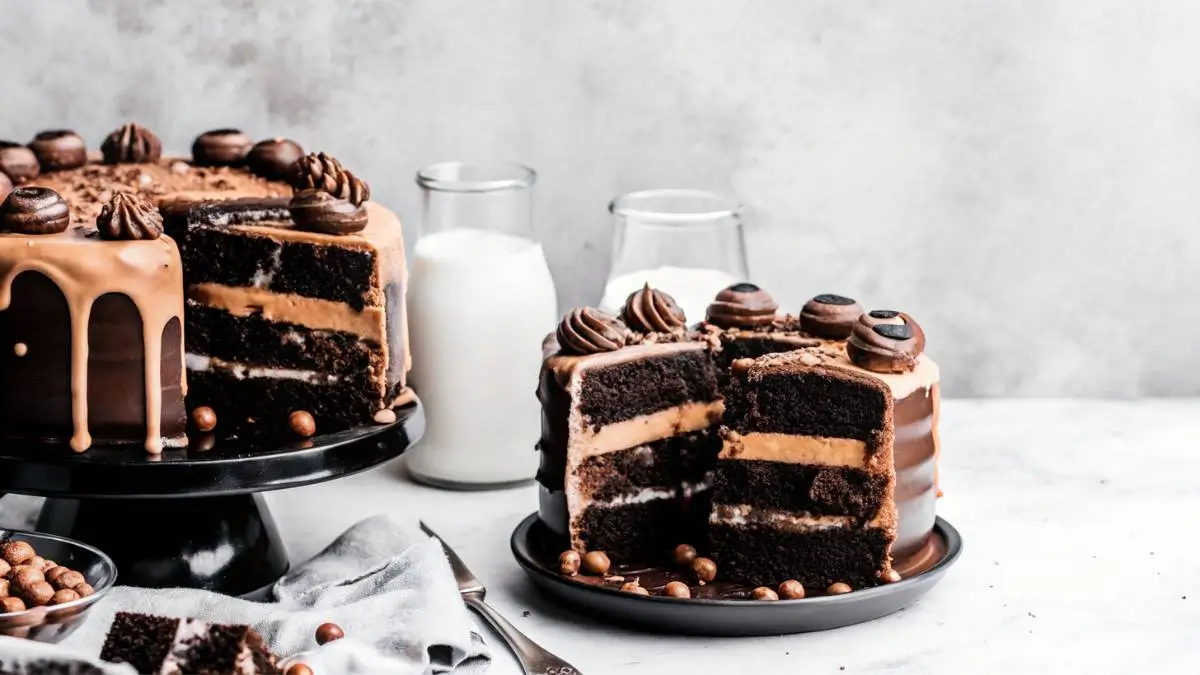
There’s something undeniably comforting about a classic chocolate cake. Maybe it’s the nostalgic taste of childhood birthdays or the way a single slice can instantly shift the mood of an entire room. Whatever the reason, this recipe delivers that deep, rich chocolate flavor people crave — tender layers, a fluffy crumb, and frosting that feels like a warm hug.
What makes this version stand out? A pinch of instant espresso powder in the batter. No, it won’t make your cake taste like coffee — it just enhances the cocoa so every bite feels more luxurious. Think bakery-quality, without the bakery. Whether you’re baking for a milestone or just because it’s Tuesday, this cake brings a little magic to the table.
Table of Contents
Chocolate Cake Recipe Card
- Prep Time: 45 minutes
- Cook Time: 30 minutes
- Total Time: 1 hour 15 minutes
- Serving Size: 8 to 10 slices
- Calories: Approx. 560 per slice
- Tags: Classic, Chocolate, Layer Cake, Celebration, Easy
- [Print] [Save] [Share]
Ingredients
For the Cake:
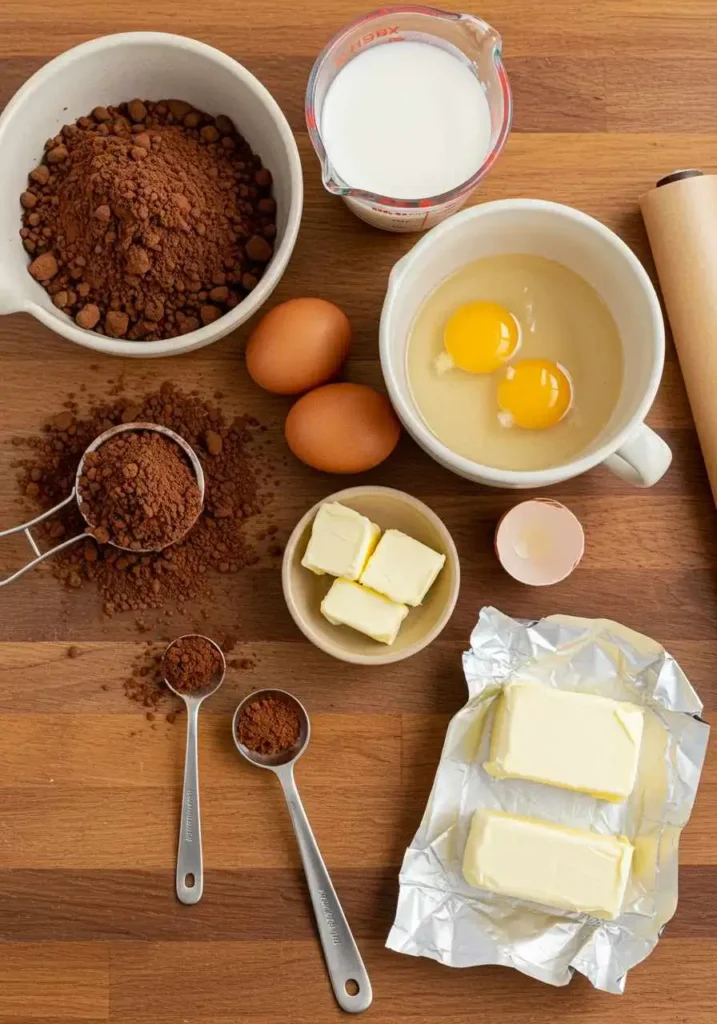
- 3/4 cup sour cream (room temperature)
- 1/2 cup buttermilk (room temperature)
- 2 large eggs
- 1/2 cup vegetable or canola oil
- 1 tablespoon vanilla extract
- 1 teaspoon kosher salt
- 1 3/4 cups all-purpose flour
- 1 3/4 cups granulated sugar
- 3/4 cup natural unsweetened cocoa powder
- 1 tablespoon instant espresso powder
- 2 teaspoons baking soda
- 2 teaspoons baking powder
- 1/2 cup boiling water
For the Frosting:
- 3 sticks (12 oz) unsalted butter, softened
- 4 1/2 cups powdered sugar
- 1 cup cocoa powder
- 1/4 cup heavy cream or whole milk (plus more as needed)
- 1 1/2 teaspoons vanilla extract
- 1/4 teaspoon kosher salt
How to Make Chocolate Cake (Step-by-Step)
Baking a chocolate cake from scratch doesn’t have to be intimidating — it’s more like assembling a delicious ritual. With the right order of steps and a bit of patience, you’ll end up with a cake that looks and tastes like it came from a professional kitchen. Let’s walk through it together.
1. Prepare your tools and oven
Start by preheating your oven to 350°F (175°C). Grab two 9-inch round cake pans, lightly grease them, and line the bottoms with parchment paper. Trust me, this small step saves a lot of heartbreak when it’s time to unmold.
2. Mix the wet ingredients
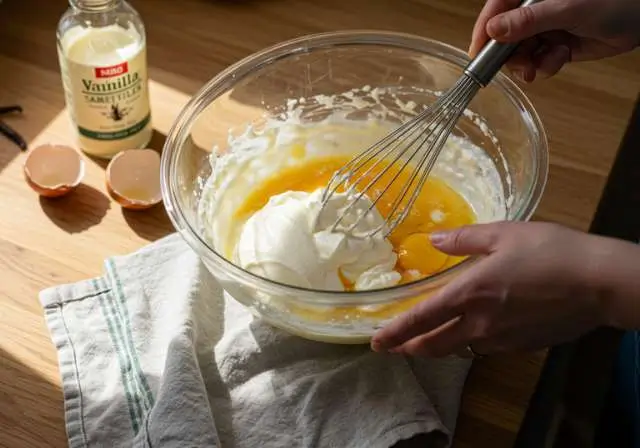
In a mixing bowl, blend the sour cream, buttermilk, and eggs until smooth and fully combined. Allow the mixture to rest for 10 to 15 minutes to reach room temperature. Afterward, blend in the oil, vanilla extract, and a small pinch of salt. The result? A silky, emulsified base that gives your cake its signature moist texture.
3. Combine the dry ingredients
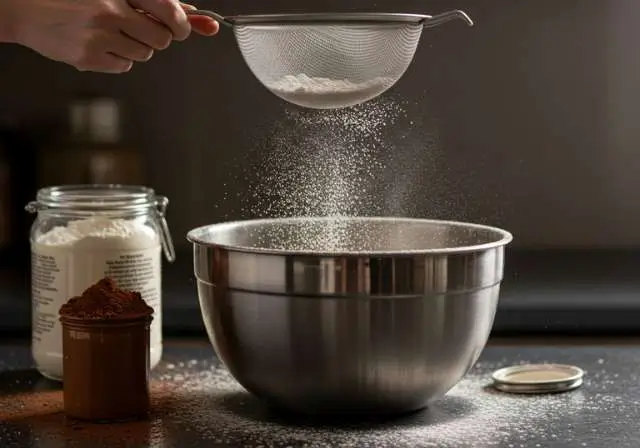
In another large bowl—or in the bowl of a stand mixer—sift together the flour, white sugar, cocoa powder, espresso powder, baking soda, and baking powder. Mixing dry ingredients evenly helps prevent clumping and ensures every bite has balanced flavor and lift.
4. Bring it all together
With your mixer on low speed, slowly pour the wet mixture into the dry. Scrape the bowl as needed and mix just until everything looks uniform. At this stage, the batter will be thick — don’t worry, that’s about to change.

5. Add the magic — boiling water
Now pour in the 1/2 cup of boiling water while the mixer runs on low. This part can feel weird, but it’s key. The hot water “blooms” the cocoa powder, unlocking a deeper, more intense chocolate flavor. Stir until just combined.
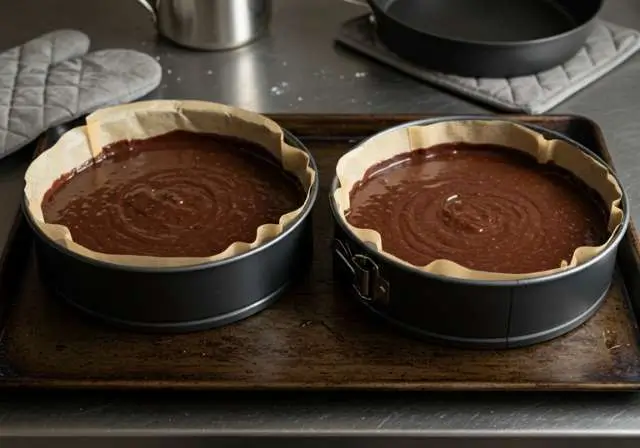
6. Bake the cakes
Evenly divide the batter between the two pans. Lightly tap the bowl on the counter to help eliminate any trapped air bubbles. Bake for 25–30 minutes — you’re looking for firm tops that spring back when lightly touched. To test for doneness, insert a toothpick into the center—it should emerge with a few moist crumbs, not raw batter.
7. Cool completely
Once baked, let the cakes cool in their pans for about 10 minutes. Next, slide a thin knife around the edges to loosen the cakes, then carefully turn them out onto wire racks to cool. Peel off the parchment and let them cool fully before you even think about frosting.
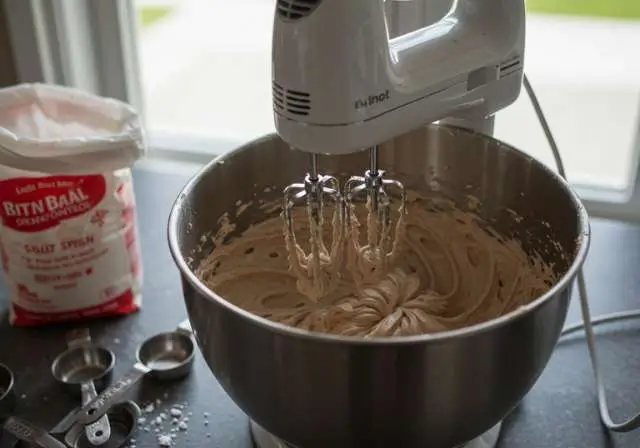
8. Whip up the frosting
In a clean bowl, beat softened butter until it looks pale and fluffy — this usually takes about 2 minutes. Gradually add the powdered sugar, cocoa powder, vanilla, salt, and cream. Start on low to avoid sugar clouds, then turn up the speed until the mixture is smooth and spreadable. If the mixture seems too thick, stir in a bit more cream to adjust the consistency.
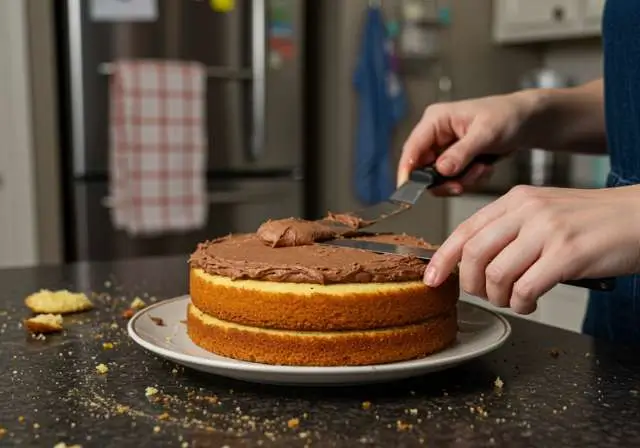
9. Build your masterpiece
Place one cake layer on your serving plate. Spread a thick layer of frosting over the top, all the way to the edges. Gently place the second cake layer on top, bottom-side up (for a flatter finish). Use the rest of the frosting to generously cover the top and sides of the cake. Go rustic or smooth, whatever matches your vibe.
What if my cake turns out dry?
Dry cake usually means it was overbaked. Next time, check for doneness five minutes early — ovens can vary. Don’t leave out the oil and buttermilk—they play a crucial role in creating a soft, moist crumb.
Tips & Tricks for Rich, Moist Chocolate Cake
Even with a solid recipe, little details can make the difference between a good chocolate cake and a can’t-stop-eating-it masterpiece. These tips will help you get that perfect, bakery-style result every time.
Use room-temperature ingredients
This isn’t just a baking cliché — it’s science. Cold eggs or dairy can cause the batter to clump or bake unevenly. Pull your eggs, buttermilk, and sour cream out of the fridge about 30 minutes before you start.
Don’t overmix the batter
Once the flour meets liquid, gluten starts to form. Overmixing toughens the structure, which is great for bread… but not cake. Stir the mixture just until everything is fully incorporated and smooth; avoid overmixing. A few tiny lumps are better than a rubbery crumb.
Always bloom your cocoa
Adding hot water to the cocoa powder isn’t just a fancy step — it’s how you unlock its full flavor potential. Blooming the cocoa intensifies the chocolate flavor, adding richness and depth to each bite.
Invest in an oven thermometer
Most ovens lie — seriously. That “350°F” on the dial might actually be 325°F or 375°F. An inexpensive thermometer helps you bake with accuracy and avoids under- or overbaking.
Chill before slicing
If you’re going for clean, bakery-style layers, let the assembled cake chill for at least 30 minutes before cutting. The frosting sets, the layers firm up, and you’ll get picture-perfect slices instead of a sliding mess.
Why is my chocolate cake sinking in the middle?
That dreaded dip usually comes from underbaking or opening the oven door too soon. Always wait until the center looks set before checking, and don’t rely only on baking time — use the toothpick test for confirmation.
Variations & Substitutions for Chocolate Cake
A classic chocolate cake is already a crowd-pleaser, but sometimes you need to switch things up — whether it’s for dietary needs, personal taste, or just to try something new. Here’s how to make this recipe your own without losing its soul.
Dairy-Free or Vegan Options
For a dairy-free alternative, substitute the buttermilk with a blend of non-dairy milk and a tablespoon of vinegar or lemon juice—let it rest for 5 to 10 minutes until it slightly curdles. Replace the sour cream with a thick plant-based yogurt or rich coconut cream. For eggs, a popular vegan sub is 1/4 cup applesauce or two tablespoons of ground flaxseed mixed with six tablespoons of water. Use vegan butter along with a bit of oat milk to create a smooth, dairy-free frosting.
Gluten-Free Twist
Replace the all-purpose flour with a 1:1 gluten-free flour blend designed for baking. Ensure your cocoa powder and baking powder are certified gluten-free if you’re avoiding gluten. Texture may be slightly more delicate, but the flavor stays spot on.
Different Frostings
Not a fan of chocolate buttercream? Try one of these:
- Cream cheese frosting for a tangy twist
- Salted caramel frosting for contrast
- Peanut butter frosting for Reese’s vibes
- Whipped ganache if you’re feeling luxurious
Flavor Add-Ins
Want to add a signature flair? Try:
- A teaspoon of cinnamon or chili powder for a Mexican chocolate feel
- Orange zest for brightness
- Mini chocolate chips for texture
- A shot of espresso for more depth (yes, on top of the powder — trust us)
Can I turn this into cupcakes or a sheet cake?
Absolutely. For cupcakes, fill liners 2/3 full and bake at 350°F for about 18–20 minutes. For a 9×13-inch sheet cake, bake for 30–35 minutes. Always test with a toothpick — the timing might shift slightly based on your oven.
FAQs
Why use espresso powder in chocolate cake?
Espresso powder doesn’t make the cake taste like coffee — instead, it intensifies the chocolate flavor. It’s a subtle but powerful trick to create a deeper, more complex cocoa taste. If you’re caffeine-sensitive, you can leave it out without ruining the recipe.
Can I make the cake in advance?
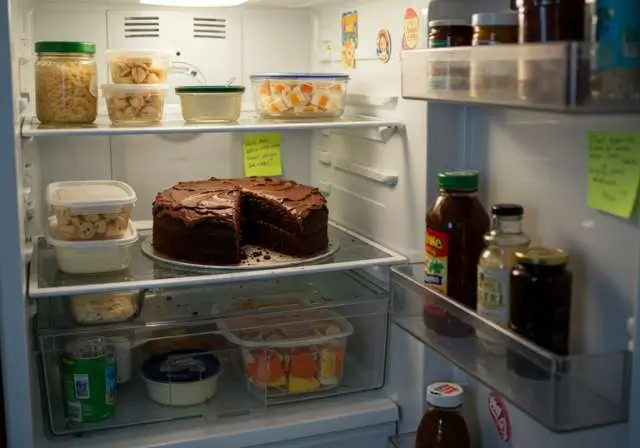
Yes — in fact, it’s often better. Bake the layers a day ahead, wrap them tightly in plastic, and store at room temperature. You can also prepare the frosting in advance and store it in the refrigerator until ready to use. Just let it soften before spreading. The fully assembled cake can chill overnight too — just bring it to room temp before serving for the best texture.
How do I store leftovers?
Store leftover cake covered in the fridge for up to 5 days. For longer storage, wrap slices in plastic wrap and freeze them. Thaw overnight in the fridge or for 1–2 hours at room temperature.
Can I use Dutch-process cocoa instead of natural?
You can, but it may change the texture and rise. This recipe is designed for natural cocoa powder because it reacts well with baking soda. If you want to use Dutch-process, you may need to adjust the leavening (usually more baking powder, less baking soda).
What if I don’t have sour cream?
No sour cream? No problem. You can sub it with plain Greek yogurt (full-fat works best), or even a mix of milk and a spoonful of vinegar or lemon juice in a pinch.
Do you have questions about Chocolate Cake? Drop them in the comments and let’s get cooking!
Conclusion
There are cakes you bake once and forget — and then there are cakes like this one. The kind that earns a permanent place in your rotation. With its rich cocoa flavor, super-moist crumb, and fluffy chocolate frosting, this recipe checks every box for chocolate lovers. Whether you’re baking for a birthday, a holiday, or just a quiet weekend moment, it delivers on both flavor and feeling.
And maybe that’s what makes it special. It’s not just a dessert — it’s a little bit of ceremony, a small celebration in every slice. So print it, bookmark it, tweak it with your own flair… but definitely make it. This chocolate cake is ready to become a classic in your kitchen too.